Pages

Showing posts with label Mains. Show all posts

Thursday, January 3, 2013

In My Kitchen - January 2013

Happy New Year! The first In My Kitchen post for 2013 is a little bit exciting. My family and friends were incredibly kind this festive season and I am proud to showcase a few new trinkets, as well as a few indulgent summer treats.

In my kitchen is a Map Bella pod coffee machine and an accompanying milk frother. This was courtesy of my mum for Christmas. We debated earlier in the year whether easily accessible, good tasting coffee in my kitchen was a good idea and remained largely undecided. When my mum generously offered to buy us (and my brother and sister) one of these babies for Christmas, my sleep deprivation answered for me. So far I have maintained self control and limit myself to one coffee per day. This morning I even gave an iced coffee a go, and think I have found my new best friend. The unit itself is small and quiet and has nestled into my kitchen quite comfortably. You can see by the lack of sheen on the milk frother that it is getting used, or maybe that's just a reflection of my cleanliness.

The girls saw the coffee machine and immediately thought of babycinos, so in my kitchen is a packet of marshmallows ready to go. Pascall is the only brand of marshmallow that I allow through the door.

 
In my kitchen is a copy of Superfoods, courtesy of a Secret Santa that we did with Hubby's family. This book provides all the justification I need that consumption of 70%+ cocoa chocolate will improve my life. It's ideals of acceptable quantities differ a little to my own, but let's not focus on the fine print. The book also provides some lovely recipe suggestions for each of the Superfoods. Thanks Secret Santa!
 
 
A not so secret Christmas hamper from my sister-in-law included some cool kitchen trinkets. She is a shameless Ikea junkie, so most of them were courtesy of the Scandinavian mega-store. The most interesting was this cheese grater, complete with "catch bowl".


Another favourite from the hamper was this silicone ice-cube tray, which will inevitably get used for making chocolates in my kitchen.
 
 
In my kitchen is a copy of Vegetables: grow them, cook them, eat them, which I bought from the Book Depository a few months ago when getting some Christmas presents for the kids, and completely forgot about. It was a kind of Christmas present to myself when I found it. The book provides useful information about how and when to grow different vegetables as well as what to do with them.
 
 
In my kitchen (well not anymore as I polished off the packet yesterday) is this shameless indulgence. I used to be a massive fan of licorice bullets. Home brand was fine, wrap some dodgy chocolate around a piece of hard/chewy licorice and I was happy. That was before I discovered Macro Organic Milk Chocolate Coated Licorice. This is the stuff dreams are made of. The chocolate is divine, the licorice is soft, and the pieces are large balls, not dissimilar in shape to a chocolate-coated almonds. I vow never to buy the cheaper counterpart again, but I must also promise myself I will only rarely purchase the Macro variety as I will eat all 180g in one sitting, stopping only to vomit.


In my kitchen is a jar of Beerenberg Tomato Chutney. Hubby has had time off work over Christmas and New Year, and so we have had lots of sandwiches/wraps as easy lunches and dinners that don't require leftovers to take to work. What they do require though, is a good chutney. Beerenberg (apart from being awesome because is has the word "beer" in the title) make some pretty tasty chutneys. Our favourite is probably the Taka Tala, but our supermarket was out and this is a good substitute.

 
In my kitchen is a new lunch box and drink bottle. This is bitter sweet for me, as they are Chicky's. At 4.5, she will start WA kindergarten in a few weeks. While she is more than ready, and super excited about starting school (she picked the lunchbox and drink bottle when we went shopping this week), there will be two and a half days a week that my baby won't be with me. For a full time mum, that's hard to take. If I'm not in labour on her first day of school (which is entirely possible), there will be tears, and they won't be Chicky's.


Finally in my kitchen this month, is light! We have 4 down lights in our kitchen, but we haven't had all 4 working at the same time for as long as I can remember. For the longest time I got by with just one above the main kitchen bench, but then the week before Christmas that one gave up too. Last week hubby replaced all 4. I'm finding all that light a little overwhelming, and it makes my often filthy kitchen floor so much more obvious. It does make food preparation safer though!


That's what's happening in my kitchen as we begin 2013, and in the month that our 3rd child will be born (unless she decides to be fashionably late). To see how some other people are beginning 2013, visit Fig Jam and Lime Cordial.

Monday, October 1, 2012

In My Kitchen - October 2012

Wow, I think this is the first In My Kitchen post that I've managed to get out at the start of the month! Maybe I'm a little excited about some new toys, or maybe I've been doing way too much baking (and eating) that I'm feeling in touch with my kitchen this month. Either way, here's what's in my kitchen this month.

My recent discovery of The Book Depository has been a little dangerous. My debut purchase involved a heap of kids books, put away for Christmas, some running/exercise books and of course some foody books. I'm a sucker for fast, easy recipes, so couldn't say no to Nigel Slater's Real Fast Food. This book is great for ideas when you've got some staples in the pantry, are short of time and lack inspiration. Slater shows you how to prepare common ingredients, several different ways which I love. His recipes are also open to interpretation so you can totally work with what you've got in the fridge. There are no pretty pictures, so if that's your thing then it might not be for you, but if you often find yourself preparing dinner shortly before you want to eat it, this book is great!


Because I am an unashamed sweet tooth, I couldn't go past Slater's dessert version: Real Fast Desserts. I have already tried out his Chocolate Almonds and they were a big hit, so I'll be giving a few more of these recipes a go soon.


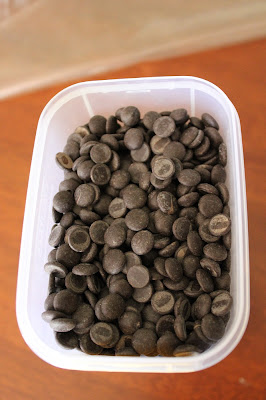
I normally order my dark chocolate two ways. Callebaut brand 54% callets in a 2kg bag, which I use for muffins and biscuits as the callets are small. I also buy a two-pack of Sicao Classic Dark (also 54%) 1.5kg bags. The Sicao brand is a little cheaper than Callebaut but I consider the quality to be comparable. The Sicao callets however are large (akin to Nestle melts) and while they don't work well in bite size treats, they are perfect for melting. Sicao have recently changed their product coding, and confusion at the distributor meant I received 1 packet of 54% and 1 packet of 70% (which happen to be the smaller callets). This is great for me because I haven't before experiemented with 70% callets. If I can stop myself from eating them all straight from the container, I might test out some darker recipes.


Another exciting part of my recent chocolate delivery was a Callebaut flavoured sampler pack of chocolate buds. This includes about a cup measure each of cappucino, strawberry, lemon (interestingly these are green, not yellow), caramel and orange flavoured buds. I lifted my self-imposed chocolate ban today and made some Apple Caramel Muffins (below).


Apple Caramel Muffins
These are a variation of my favourite Banana Choc Chip Muffins, made this afternoon because I was out of bananas.

60g butter, melted
2 cups wholemeal self-raising flour 
1/3 cup raw caster sugar 
1/4 tsp cinnamon
1/2 cup milk
2 eggs
1 apple, grated with skin on
1 cup caramel buds

  1. Preheat oven to 200C. Line a 12 hole muffin tray with paper cases.
  2. Mix flour, cinnamon and sugar together in a large bowl.
  3. Lightly whisk eggs with milk, add to flour mix along with apple and melted butter.
  4. Mix with a spatula until batter just comes together.
  5. Add caramel buds and mix to combine.
  6. Spoon mixture into muffin cases and bake for 12-15 mins or until just beginning to brown.


I kind of added lib with this recipe and hoped it would work. It did. I'm not a massive caramel fan so find the caramel buds a little sweet but the combination of flavours definitely works. Now I have to think of some interesting recipes for the other flavours.

Head over to Fig Jam and Lime Cordial and check out what some other bloggers have in their kitchens this month.


Thursday, September 20, 2012

Pasties

If there is one meal in my house that falls into the "comfort food" category, it's pasties. I know they are more evil than they are good, but damn they are tasty! In the winter they do seem to creep onto our regulars list, but I tend not to make them more frequently than once a fortnight at most, for the sake of our arteries and waistlines.

I don't particularly enjoy making pastry, of any sort, and this is no different. Shop-bought frozen puff pastry is easy, cheap and generally of sufficient quality warrant saving my time and energy. You can now also buy reduced-fat puff pastry which isn't as flaky as its butter-filled counterpart but is still tasty. Here is what a pastie looks like in my kitchen. This will serve myself, Hubby and the babes with enough for one adult lunch left over.

500g lean beef mince
2 potatoes
2 carrots
1/2 cup frozen peas
1/4 cup tomato sauce
2 tbsp mustard (I either use french or wholegrain, whatever I have on hand)
good shake of season-all
4 sheets reduced-fat puff pastry, just thawed

  1. Preheat oven to 200C (fan forced). Line 2 large baking trays with baking paper.
  2. Dice carrots and potatoes.
  3. Combine carrots, potatoes, peas, tomato sauce, mustard and season-all in a large bowl. Mix thoroughly with your hands until well combined.
  4. Divide mixture evenly across the 4 sheets of pastry, arranging it on the diagonal.
  5. Pull in the corners of the pastry, one at a time, wrapping the meat mixture up in a parcel.
  6. Prick each parcel several times with a fork
  7. Cook for 20 mins or until browning nicely, then reduce heat to 160C and cook for a further 30-40 mins until escaped juices have dried up. 

You can fold the pastry any way you like, but I find the parcel method ensures an even pastry to filling ratio across the whole pastie and you don't get left with excess pastry around the edges that doesn't contain any meat. I also normally divide my 4th sheet of pastry into 4 even squares and make mini pasties for the girls. These often need removing from the oven about 5-10 mins before the big ones.

I love pasties served with tomato sauce, but the filling is tasty enough that it's not necessary. Of course you could adapt the filling to add whatever you like (corn, beans etc) and change the flavouring. I sometimes add some worcestershire sauce or horseradish. You can reheat pasties in the microwave, but like all pastry, reheating in the oven avoids soggy pastry, and I'm yet to meet anyone who likes soggy pastry.

Tuesday, September 18, 2012

In My Kitchen - September 2012

This month's In My Kitchen post comes a little late, and for no good reason. I was contemplating skipping it altogether in favour of sulking over my lack of new gadgets, and delayed postage on some new books I ordered, but I have spent a lot of the time in the kitchen this month and convinced myself an update was warranted.

In my kitchen today is...


a Raspberry Yoghurt Cake. I originally came across Celia's Blueberry and Yoghurt Cake recipe some time ago. Hubby doesn't really like cake, but this is one he'll steal the last piece of. The original recipe can be found here at Chocolate and Zucchini. Anything with yoghurt in the recipe is guaranteed to be moist, and to remove the "cakiness" of cake, hence why this one was a winner in our house. I normally use whichever berries I have on hand and today it was raspberries. I also never use white sugar and so replaced that with raw caster sugar in the recipe. Otherwise I followed the recipe exactly and I'm waiting for the cake to cool so I can have a piece! Most of it however will be shared with some lovely ladies and their children at a local coffee morning tomorrow.

In my kitchen quite a lot lately has been...


a pot of Teresa Cutter's Vegetable Minestrone Soup. This is the simplest and tastiest vegetable soup I've made, and one the whole family seems to enjoy. It is simple, vegetable-filled, low in salt and delicious. The capsicum is the dominant vegetable I think, and that makes the taste of this soup really unique from other vegetable soups. Did I mention it was healthy? And it contains no potato so it a fantastic low-carb option for lunch or dinner. I serve this as a main meal with a fresh loaf of Mixed Seed Bread. I also love these soup bowls that my mother-in-law almost got rid of at a garage sale a few years ago before I spotted them and took them home.

In my kitchen earlier this month was...


a birthday cake for my gorgeous "kind-of-sister-in-law" Kate. A fortunate twist of events meant I was able to see Kate on her 26th birthday, and make her a birthday cake, or 24. I used this divine Brownie Cupcake recipe and topped them with a whipped milk chocolate genache. I didn't even know you could whip genache until coming across Savoury Sweet Life, but the result is a beautifully pale and extremely stiff topping perfect for piping. The letters were made with white chocolate. I melted the chocolate, poured it into a zip lock bag, snipped the very end off the bag and piped the letters out onto a baking paper-lined oven tray. I then cooled the letters in the fridge and when they were set, moving very quickly to avoid melting them with my hands, arranged them on top of the genache. This was a great cake for sharing, and the munchkins could have one to themselves without consuming too much brownie.

So maybe my kitchen isn't that boring this month. Check out what's happening in some other kitchens around the world by visiting the links at Fig Jam and Lime Cordial.
Saturday, May 12, 2012

Impromptu Crabs

Being on holiday makes me forget which day it is. It's only really important if I need to visit the post office and it's a Sunday, but even then it isn't REALLY important. One day last week, I'm not sure which, we camped on the beach at a place called Herald Bight, north-east of Denham. People often refer to this area as Shark Bay as it is within the Shark Bay Heritage Area. It's a beautiful part of Western Australia, and if there's any opportunity for a simple camp on the beach, I'm there.


I was just making a start on dinner, and hubby and the girls were combing the beach when they noticed a lot of crabs in the shallows. We aren't carrying any crab scoops with us, but hubby thought he'd try his luck with a pair of leather gloves. I laughed, thinking there was no way he could catch adult Blue Swimmer Crabs with his hands, but no more than 5 minutes and 10 crabs later, he was the one having the last laugh. Well we all were actually, I stopped what I was making and threw a salad together. We were having crabs!


Just in case that wasn't enough of a surprise, a film crew from 4WD Touring who happened to be camping up the beach from us saw the crab-catching and came over for a chat. They interviewed hubby about the trip and the trailer, and then took some footage of him catching the crabs with his (almost) bare hands, with Chicky on his back in the ERGO (a child carrier). It was all a bit surreal.

We boiled some salted water in a big pot, put the crabs in and let the water boil again, then pulled them out after 3 minutes on the boil. They were amazing. There really is nothing like freshly caught seafood.


Tuesday, April 3, 2012

Comfort Food

After a busy weekend down south including a triathlon and our first camping trip in the home-made camper trailer, I was in the mood for something with a high satisfaction to preparation time ratio. Something where I could put in little effort but reap tasty benefits. The solution: pizza and crumble, two of my "comfort foods".

Pizzas are a dinner that hubby loves, the girls will eat, and are almost as quick to prep as a salad. I always use some sort of wrap or flat bread as a base. We love our bases thin and crispy, and while I've made my own before, we still prefer a simple wholemeal wrap. Toppings vary depending on what is in the fridge at the time. Sometimes I use home-made pasta sauce, tomato paste or BBQ sauce. Yesterday I tried a shop bought pizza sauce which was basically tomato paste with herbs mixed through. It wasn't anything phenomenal but it was still nice. Chicky is fussy when it comes to toppings. Last night her pizza was topped with mozzarella cheese, halved cherry tomatoes, capsicum and green olives. The rest of us also had field mushroom, pepperoni and baby spinach. I managed to grab a photo before they went into the oven, but you've got to move quick around food in this house, and as soon as they were cooked they were being eaten, so unfortunately I didn't get a "finished" photo.


Dessert was apple and rhubarb crumble. I put this in the oven then went to the gym. When I came home half of it was gone, and the rest was in no way photogenic, so the "before" shot of the rhubarb will have to do.


This is my favourite crumble recipe. It's loosely based on a recipe from The Australian Women's Weekly Cookbooks: Cooking Class Basic. It's not terribly evil so I don't feel like I'm completely ruining a week of exercise by eating it.

4 stalks rhubarb, cut into 2cm pieces (from the garden)
2 apples peeled and sliced thinly
1 tbsp raw sugar
1/4 cup rolled oats
1 tbsp dessicated coconut
1/3 cup wholemeal plain flour
1/4 tsp cinnamon
40g butter, chopped
1/4 cup packed brown sugar

  1. Place rhubarb, apple and raw sugar in a saucepan. Stir over low heat until sugar starts to dissolve. When sugar has dissolved, cover and simmer until fruit has stewed and rhubarb is soft.
  2. Combine butter, coconut, flour, cinnamon and brown sugar in a bowl and rub between your fingertips until the mixture is coarse and crumbly. Mix oats through.
  3. Place stewed fruit in a baking dish and top with crumble mixture. Bake at 180C for about 30mins or until the crumble is golden brown.

I love crumble served hot with vanilla icecream, but it's also very yummy drowned in custard. I also vary the fruit that I use. Apple and raspberry is another great combination. You can even use tinned baking apples and frozen berries to cut down on the prep even more.


Sunday, February 5, 2012

Pantry Challenge Soup

I always used to do my grocery shopping on a Monday. The pantry was "empty" after a weekend of eating, cooking and baking, and it was great to get the kids out of the house on a Monday morning to stave off post-weekend boredom. A few months ago however, I read a post on Stay at Home Mum's blog that suggested shopping every 8 days instead of weekly, as a money-saving tip. The theory is that you'll buy the same amount of groceries whether you shop weekly or every 8 days. I'm particularly frugal and always up for a bit of money saving, so I've been applying this for a few months now and find it fairly effective.


With that as background, I often set myself a "pantry challenge" to use up some of the forgotten ingredients in the pantry or the sadder looking vegetables in the fridge. Today I cleaned out the fridge and made a Pantry Challenge Soup. Use anything you have on hand, that's the point. No shopping required, or allowed! Here is the recipe for today's soup:

1 carrot
2 turnips
3 celery stalks
2 medium potatoes
1 onion
1 zucchini
2 garlic cloves
2 tbsp tomato paste
2 litres vegetable stock (I used stock made from Massel Ultracubes)

  1. Chop vegetables into small pieces. Note: I blended my soup so wasn't particularly careful with the size and shape of my pieces, but if you rather a chunky soup you could chop them into pretty cubes.
  2. Crush or grate garlic and add.
  3. Add stock and tomato paste, stir.
  4. Bring to the boil then reduce heat and simmer until veges are soft (about half an hour).
  5. Whiz with a stick blender, or don't, and serve with chopped parsley and bread.

You can add some fancy ingredients if you have them on hand, but I find the combination of tomato paste and vegetable stock is all this soup requires. Hubby prefers his soup blended, but if I were going to leave it chunky I would have added some pasta about 15 minutes into the simmer. To add to the frugal nature of this dinner, I ate it with sliced bread and butter, but you could easily dress this soup up with a crusty baguette if you're entertaining.